We are now required to collect sales tax in several states. Learn more about tax exempt status for your business.
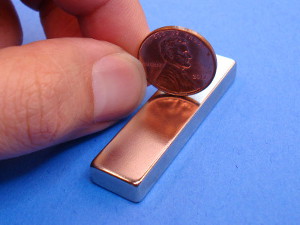
Can neodymium magnets be painted? What kind of paint should be used? What kind of preparation assures good paint adhesion to the nickel plated surface of a neodymium magnet? Will paint affect the strength of a magnet?
In this article, the folks at K&J break out some spray paint to try and answer these questions.
We hear about all sorts of good reasons. Let’s list a few here:
We’ve heard from more than one customer that getting paint to adhere consistently well can be a challenge. The smooth nickel plating seems to be difficult for some paints to adhere to.. What can be done to improve this performance?
First and foremost, we must stress this critical advice: Start with a clean surface. Clean any surface well before applying paint.
Paint and adhesive manufacturers always give this advice. Even knowing it, we’ve been guilty of not properly cleaning surfaces first. A sad majority of paint problems can be traced to part contamination prior to painting. It’s amazing how a simple greasy fingerprint can cause problems!
In each of the different experiments below, we cleaned the top surface of the magnets with a paper towel dipped in paint thinner. You could use paint thinner, but other common solvents work too. For solvents you might have at home, consider isopropyl alcohol or nail polish remover (acetone).
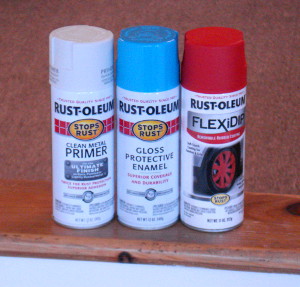
For this experiment, we tried painting a selection of magnets with both spray-on paint and spray-on rubber coating. We discussed the dip method of Rubber Coating Your Magnets in the past, but have been looking for an excuse to try the spray-on kind.
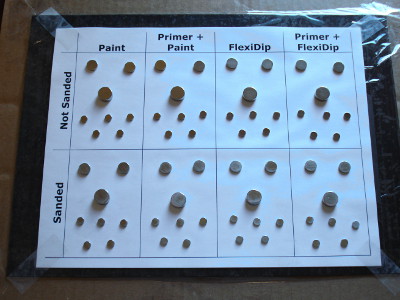
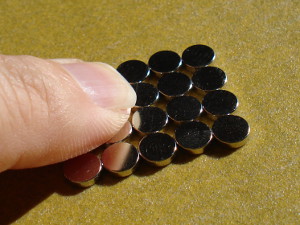
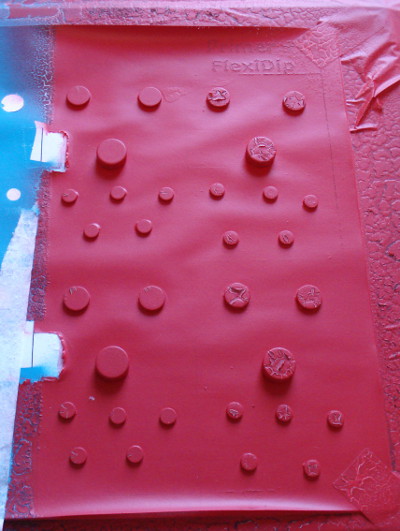
For a selection of sizes, we grabbed a few magnets from our Surplus Magnets section. We painted the ZD1, ZD2 and ZD3 disc magnets.
We divided the magnets up into 8 test categories which include:
To hold the magnets stationary for painting, we stuck them to a piece of steel sheet-metal. By using 4 layers of paper between the magnets and the steel, we got enough attraction for the magnets to stay still and not jumble together, yet still weak enough to remove reasonably easily.
We painted the magnets on a Thursday, and waited until the following Monday to see how well they performed. Hopefully, this allowed enough time for the paint to truly cure. We applied two coats of blue paint.
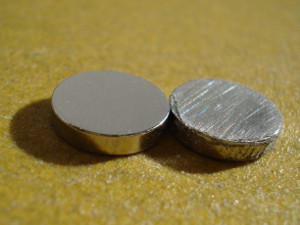
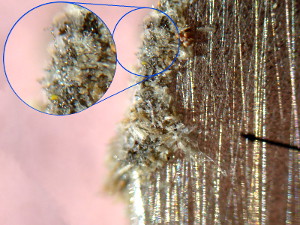
We sanded the surface of half of the magnets to roughen up the surface. Since paint adheres better to a rough surface, sanding seems like a great idea. After doing it to all these magnets, however, we learned that the process is messy.
When you sand the surface, you’re actually removing a little bit of the nickel plating. Since nickel is ferromagnetic, this dusty mess tends to stick to the magnet! It is frustratingly difficult to remove this dust. Unable to rinse it off or pull it off with our fingers, we used a piece of packing tape to remove it. By sticking a magnet multiple times to the packing tape, the small bits tend to stick to the tape instead of the magnet.
Be very sure to clean the surface well after sanding! If dust is left on the surface, the paint sticks to the dust instead of the magnet. Ironically, this makes paint adhesion worse.
We used some fine, P180 grit sandpaper. It didn't take very long to roughen the surface. We liked that this fine grit didn't make any deep grooves in the plating..
What did we find? First, a disclaimer: Our results are based on this one set of tests with one particular paint. Your results may vary. Painting is complicated. Also, we're not paint experts.
Detailed results are described below, but here's the discouraging summary: There wasn't an obvious winner. Some did better at one test, some better at another. The only sure conclusions we made are:
Upon initially examining the 4 different groups of magnets, they didn't look much different. They all showed a nice finish, with a slight "orange peel" bumpy surface. Visually, we couldn't tell these groups apart.
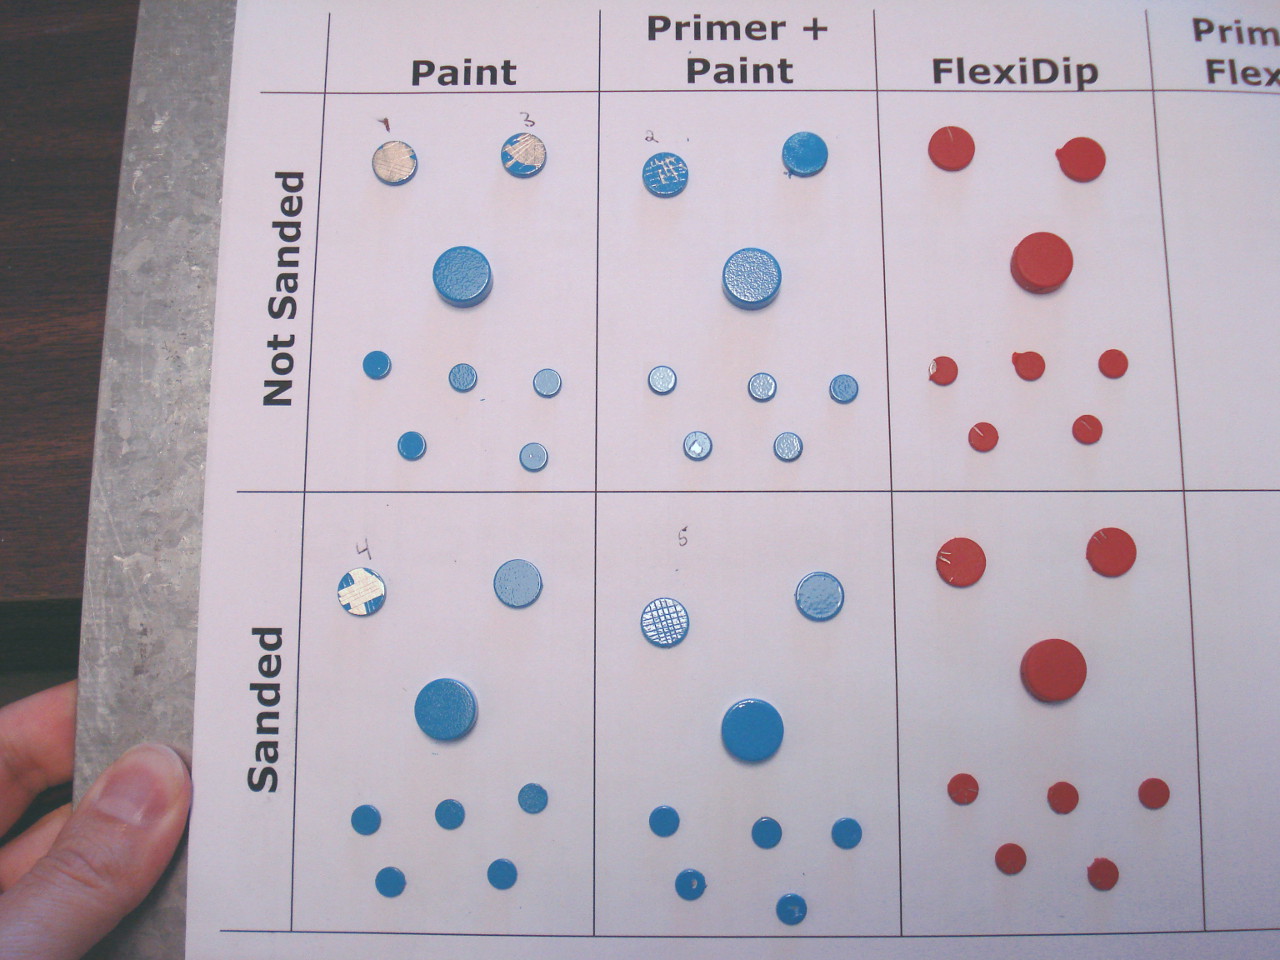
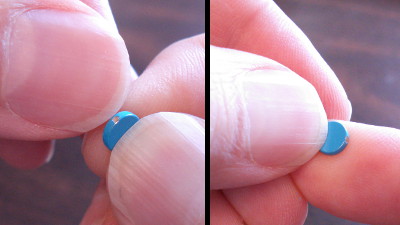
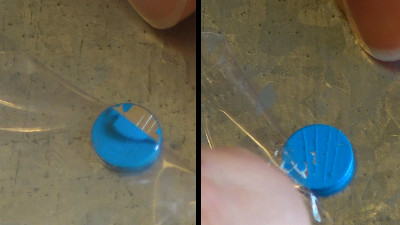
For a rough comparison of how well the paint adhered, we scratched them with a fingernail. The magnets without any primer held up well when the top surface of a thin disc magnet was scratched. We could scratch the paint off the thin edge with some pressure, but the top was fairly durable.
When we tried this with the magnets that used primer and paint, they failed. The paint & primer peeled off somewhat easily from the top surface (not shown). It ripped up and felt gummy when we dug in with a fingernail.
Conclusion #1: Primer doesn't improve matters.
There are more standarized ways of testing paint adhesion. In specifications like ASTM D3359 or ISO 2409, a series of cuts is made through the paint in a criss-cross pattern, cut down to the surface of the underlying material. Then a piece of tape is stuck to the paint and peeled off. By checking the results and measuring how much paint comes off, a number can be assigned to rate the paint adhesion.
We tried mimicking this sort of test with some of the magnets we painted. It wasn't official or exactly to the spec (we used packing tape), but it followed the spirit of the test.
Surprisingly, this test showed very different results. The magnets with primer applied before the paint did very well. Nearly all of the paint stayed on the primered magnet, and all of it stayed on the magnet that was sanded and primed. With the un-primed magnets, practically the whole top surface of paint ripped off with the tape!
Conclusion #2: Primer makes the paint adhere better.
Before trying to make sense of those oppposing results, take a look at what happened with the spray-on rubber coating. We found that this process worked OK, but didn't build up as thick a layer as the dip method described in our older Rubber Coat Your Magnets article.
With the magnets we primed first, it was a disaster. Something about that primer and rubber did not agree with each other at all. The coats peeled back and wouldn't cover the whole surface. It was filled with cracks; a complete failure.
Even the un-primed magnets we used showed some small, similar cracks after multiple coats were applied. Maybe there's some trick we don't know about, but this just didn't work well. If you are interested in rubber coating your magnets, we still recommend the dip method we used before (Rubber Coat Your Magnets).
The unexpected interaction with the spray-on rubber and the primer result makes us think a little differently about the earlier paint testing. The primer+paint combination worked much better on the cross-hatch adhesion test, but felt gummy when scratching it with a fingernail. Maybe there was some strange interaction going on between the primer and the paint. It certainly didn't feel like paint that had dried for several days. Maybe something about the combination prevented the paint or the primer from curing.
We suspect that for a durable solution, some kind of primer should improve paint adhesion. While our specific combination of paint and primer wasn't great, it suggested that there might be a good solution out there. Primer probably improves performance, but it depends.
Also, if you don't need extreme durability, such as applications for hanging artwork in a gallery, simply painting the magnets directly is a decent, easy solution. If you make sure they are clean, paint can stick reasonably well. Painting clean magnets works well.
Sanding the surface of the magnets was a lot of work. Getting the magnets clean afterward wasn't easy. While roughing up the surface sounds good in theory, it was a pain to get the magnets clean afterward. Our testing did not show enough improvement to justify sanding the magnets.
Yes, a little. How much depends on the size of the magnet we are talking about. The smaller the magnet, the more apparent the difference would be.
Magnets can be very sensitive to the distance between the magnet and whatever it is attracting to. With paint as thick as 1-3 pieces of paper, you might notice a difference in pull force to your fridge.
You can use our online Pull Force Calculator to estimate how much a layer of paint might affect the strength. A layer of paint might be about 0.004" thick.
No. Generally, the high temperature associated with the baking process in powder coating is too high for neodymium magnets. They would be demagnetized by those temperatures.
Be safe out there! Always paint in a well ventilated area.


 Cart
Cart