Build Your Own Magnet Separator
A step by step guide to build a magnet separator tool
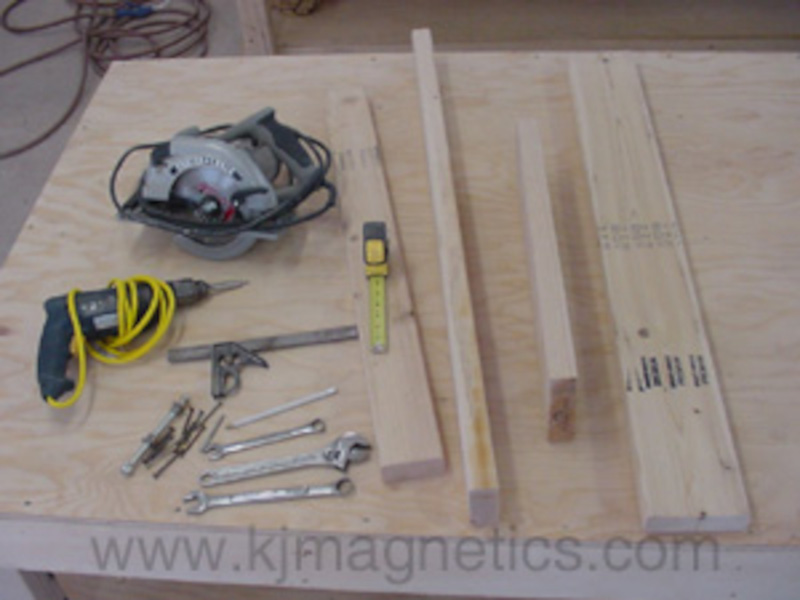
1. Gather tools and materials needed to build magnet separator
Tools
- Tape measure - To mark cuts for wood
- Carpenter's square - To mark cuts for wood that are a 90° angle
- Drill - for driving screws to hold blocks together
- Saw - to cut wood to size
- Wrench - to tighten the bolt for the pivoting arm
Materials
- 2 x 6 wood boards - About 6 feet in total
- 2 x 4 wood boards - About 3 feet in total
-
Hardware:
- wood screws x 6
- 1/2" x 6" bolt x1
- lock nuts x 2
- washers x 2
2. Build body of separator
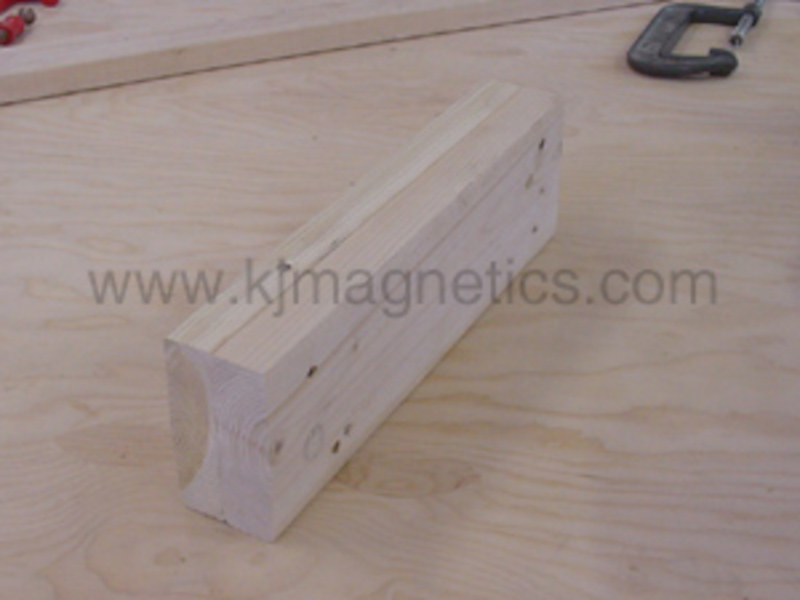
Start by cutting two 18" pieces of 2x6. Place the two boards side-by-side and screw them together with four screws, one in each corner, about 1" from the edges. When finished, the pieces should look just like the picture shown. This will be the body of the separator tool.
Shop Neodymium Magnets
Browse our large selection of strong rare earth neodymium magnets!


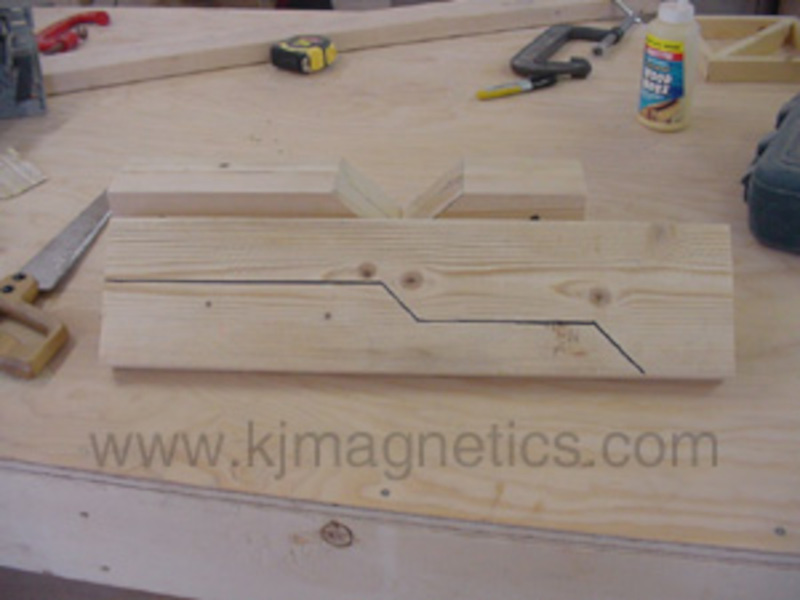
3. Mark notch in wood for cut
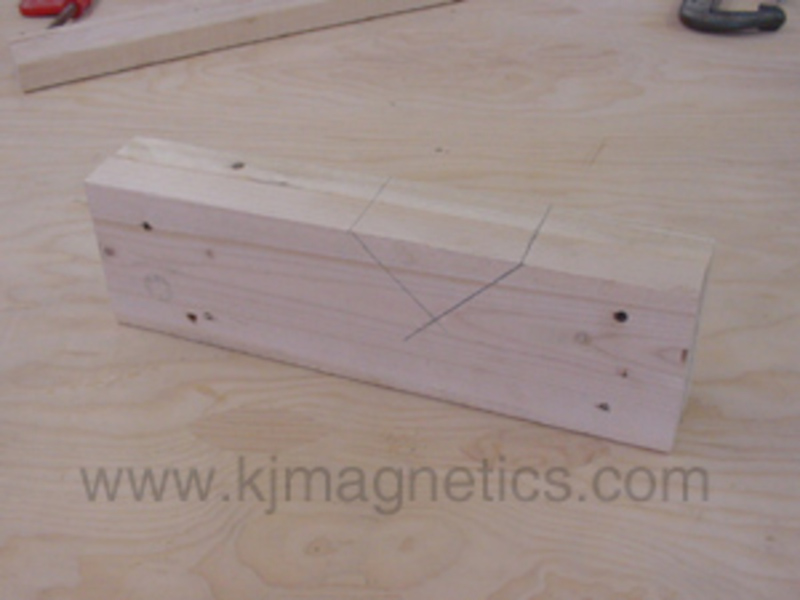
Using a square, mark the piece to cut out of the boards as shown. If you will be separating block magnets, it is advantageous if the 'V' is at a 90 degree angle. The center of the notch should be about 1/3 of the way from the back end of the boards (where the pivot bolt will go), and about 1/3 of the way through the 6" dimension of the 2x6's.
4. Create the lever arm
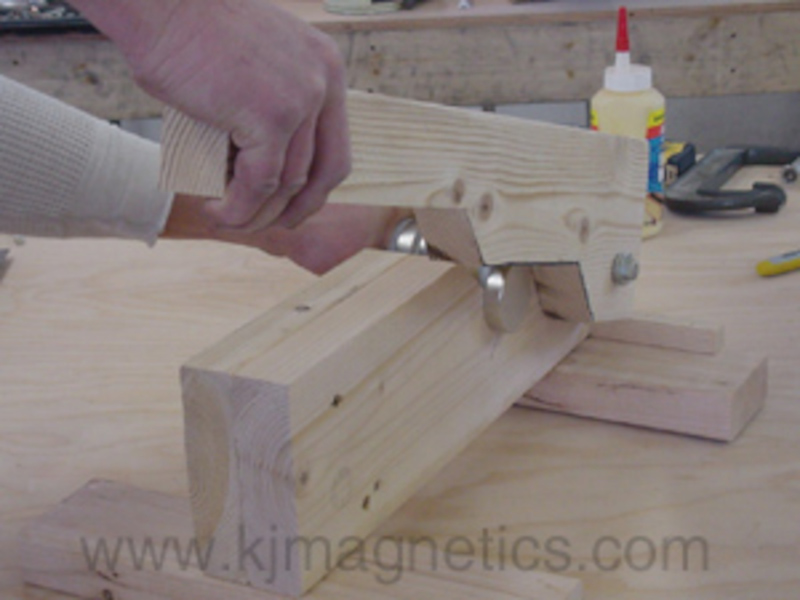
Cut a piece of 2x6 to a length of 22-26". The lever arm works best if it is cut to three levels. The part of the board above the line will become our lever arm. The rightmost section will be where the pivot bolt goes through. The middle section will be the part that does the actual magnet separating, and the leftmost section will be the handle.
The easiest way to lay this out is to align the back of the lever arm board with the back of the body you built earlier. Then make a mark on the lever 1" on either side of the notch you cut. These marks will be where the middle section begins and ends. From there, you can draw rough diagonals as shown. Each step is about 1/3 of the 6" width.

5. Drill the holes for the pivot bolt
This is the most critical part of the process. The hole in the lever arm should be about 1" from the back end, in line with the flat surface of the middle section of the lever arm. The hole in the body should also be 1" from the back end, but this should be aligned with the bottom of the cut out notch.
When using the finished tool, this alignment of the holes will cause the magnets to separate just about when the lever arm is horizontal. We have found this to work best.
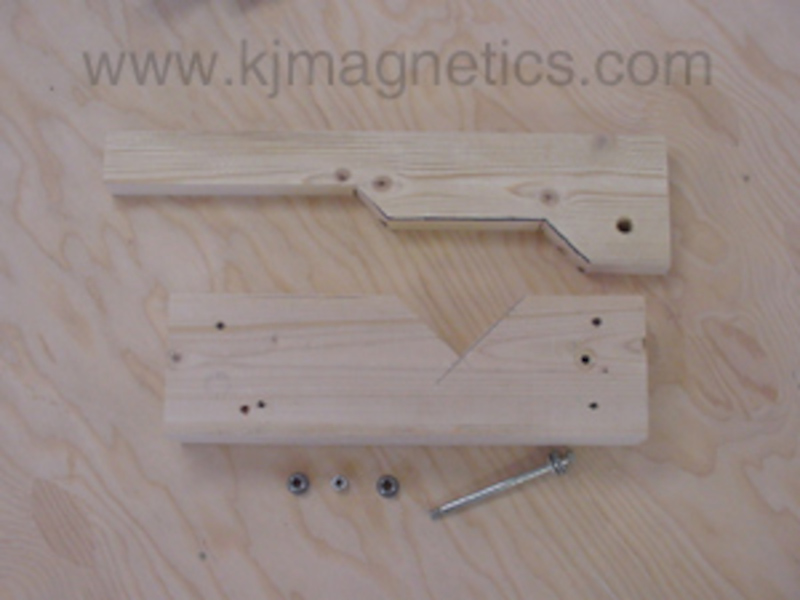
6. Bolt on the lever arm
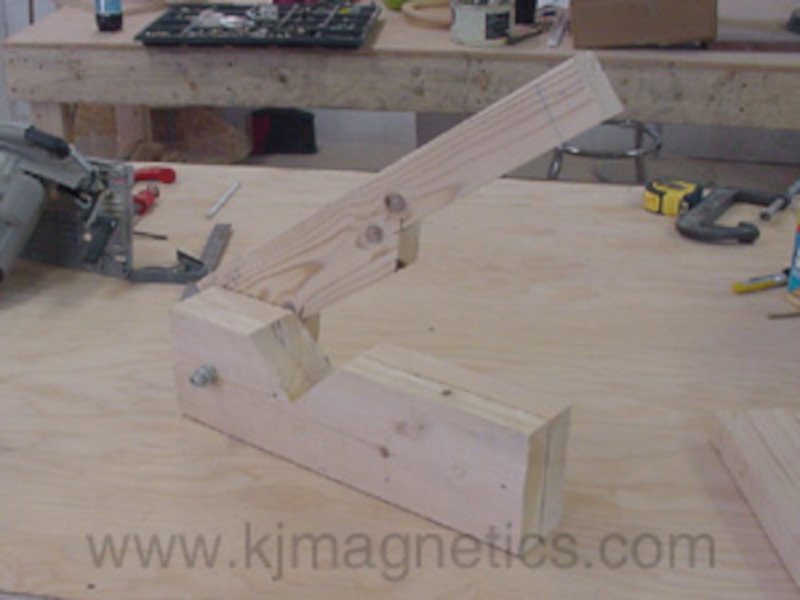
Put the bolt through the holes in the body and lever arm. If you are right handed, the tool will be easier to use if the lever is on the right side as shown. If you are left handed, the lever should go on the left side.
Tighten the bolt so the lever arm moves freely, but is snug to the body. A lock nut or double nut will keep the nut from loosening during use.
(Actually, it is easier if you screw on the feet as shown in the next step before bolting the arm on, but we didn't take pictures of that during the build.)
7. Cut and attach the stabilizing feet
Cut two pieces of 2x4 to 12-14" in length. Screw or nail them on to the bottom of the body as shown. You now have a functional magnet separator tool.
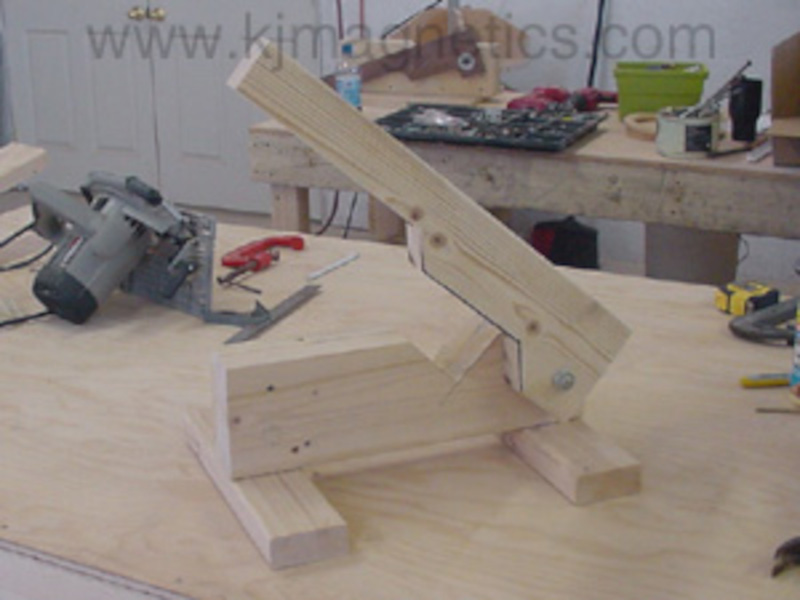
See the finished magnet separator
Place one magnet under the lever with gap between magnets over the edge of the wood and push the magnet off of the other magnets. Be careful that the magnet being separated does not jump back towards the other magnets once it is free. A second person to catch the magnet is very helpful.
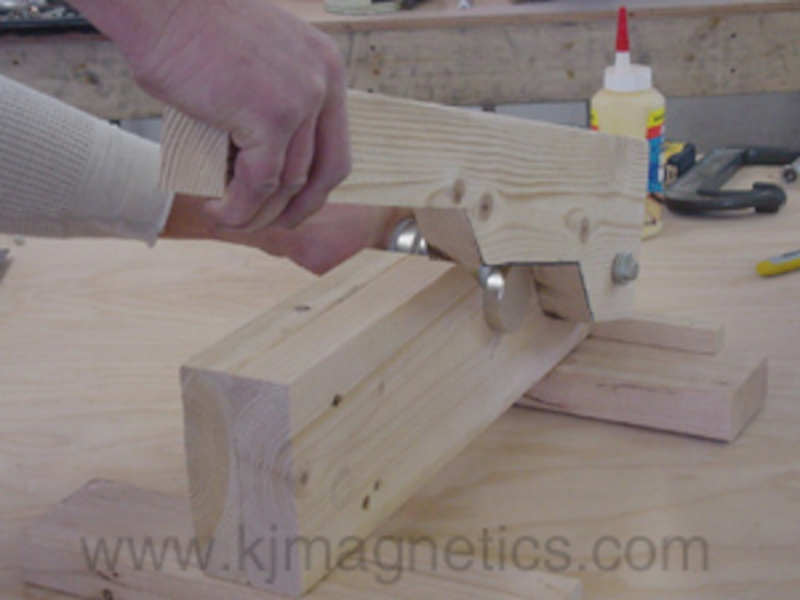
To put a magnet back onto the stack, make sure its direction is attracting to the stack, lower the lever and place under lever against wood. Slowly raise lever while holding down stack or spacer between magnets until magnet has safely joined the stack.
For more information on techniques to separate strong magnets, visit our Separating Magnets article.
Safely separate strong magnets
While magnets are used across almost every industry and can be very useful, strong neodymium magnets can also be dangerous. Therefore, it is best to always have a safety first mindset. Visit our neodymium magnet safety page to learn more about how to stay safe when handling powerful magnets.
For super strong magnets, it may be very difficult to get them apart and we have created an emergency magnet separator just in case. Learn more in our Emergency Magnet Separation article and the below video.

