We are now required to collect sales tax in several states. Learn more about tax exempt status for your business.
|
|
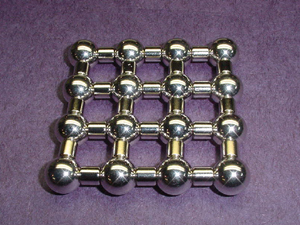
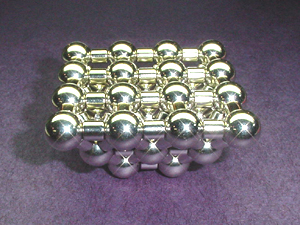
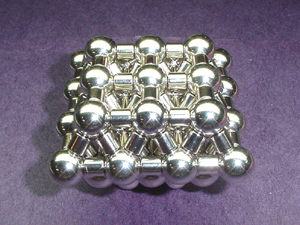
1. Build the base Take sixteen spheres and 24 rings and form the grid shape shown on the left. |
|
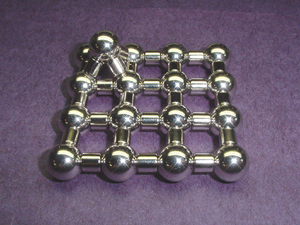
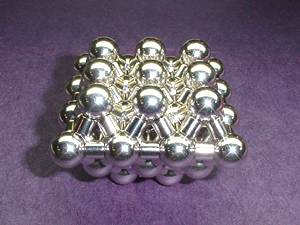
2. Start the second level with a pyramid Take one more sphere and four rings and build a pyramid on top of four of the bottom spheres as shown. |
|
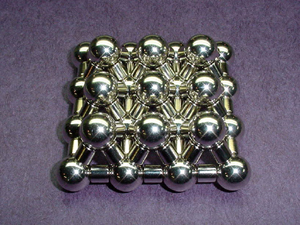
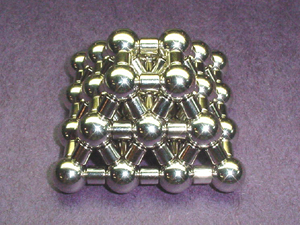
3. Finish the 9 small pyramids that make up
the second level Using eight more spheres and 32 more rings, build pyramids on top of each square on the bottom level as shown. It sometimes helps if you have a non-magnetic stick or pencil to help position the rings on the spheres. A wooden or bamboo skewer works great for this purpose. |
|
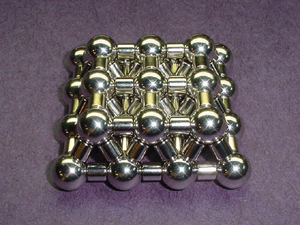
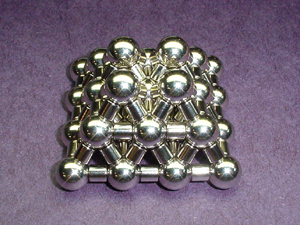
4. Tie the second level together Connect the top nine spheres using twelve more ring magnets in the pattern shown on the left. |
|
5. Build the third level Build four more pyramids on top of the nine spheres of the second level using four more spheres and sixteen rings as shown on the left. |
|
6. Complete the first half Connect the four top spheres using four more rings. You're halfway there! |
|
7. Flip it to begin building the second half Flip the whole thing upside down. (boy, doesn't this look familiar? - see step #1) |
|
8. Build the 9 small pyramids on the base Build the next level of pyramids again, just like step #3. |
|
9. Tie the level together Connect the top spheres using twelve more rings. (note: you should have no spheres left free right now) |
|
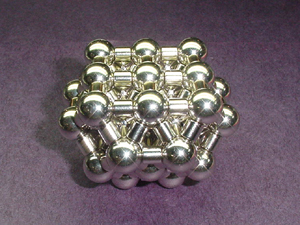
10
"Truncate" the almost-octahedron You now need to remove the spheres from the four corners (looking down on the scupture as it sits) and the four rings connected to each sphere. This is what makes it a "truncated" octahedron. |
|
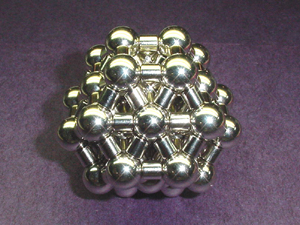
11. Complete the shape Now use the four spheres that you just removed from the corners and the sixteen rings to build pyramids on top (see step #5), then connect the top four spheres (see step #6) to complete the scuplture. Congratulations! You now have a Truncated Octahedron of your very own! |
After you
build this sculpture a few times, you will be able
to save steps by building it without the corners
that get removed in step #10.


 Cart
Cart