
Magnetic Trains
(Last Updated: 07/25/2025)
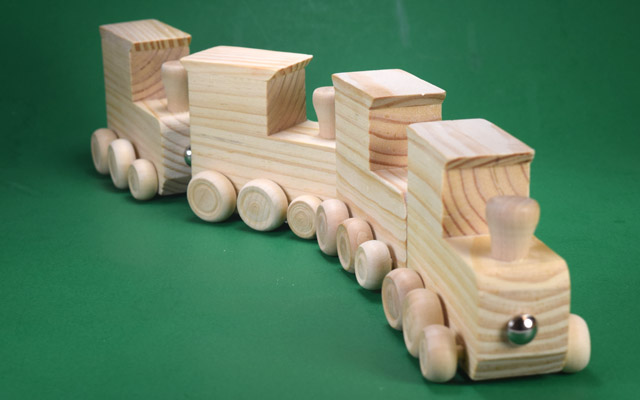
Magnetic trains are a great hobby. This month, we'll set out to create our own magnetic train set, then take it one step further and turn it into a MagLev train set!
Testing
First, we purchased some plain, non-magnetic trains online. This will allow for complete customization and allow us to experiment with different options.
Our first thought was to use some countersunk magnets, like our R622CS-P countersunk ring magnet. The countersunk hole makes it quick and easy to attach these magnets to any object. The R622CS-P countersunk ring magnet have a pull force of 3.5 lb, which is plenty strong to hold, but not impossible to separate. When installed, they had a good, firm hold, but they didn't allow the trains to turn.
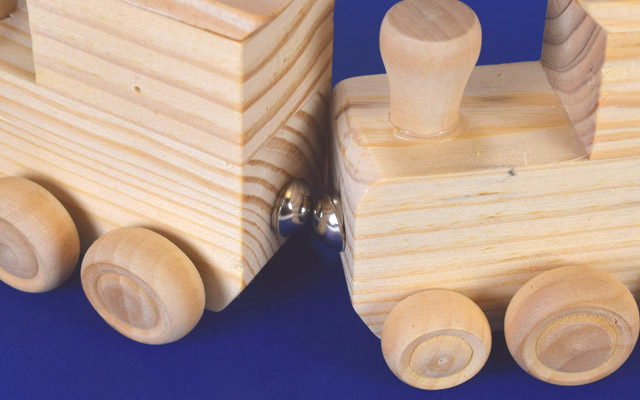
Then we put a NSB6 steel ball between them. The hold was still good, and now the trains can turn, but they don't quite have the classic magnetic train look.

Countersunk magnets for metal thumbtack or steel ball connector
Shop Now
Countersunk magnets for metal thumbtack or steel ball connector
Shop Now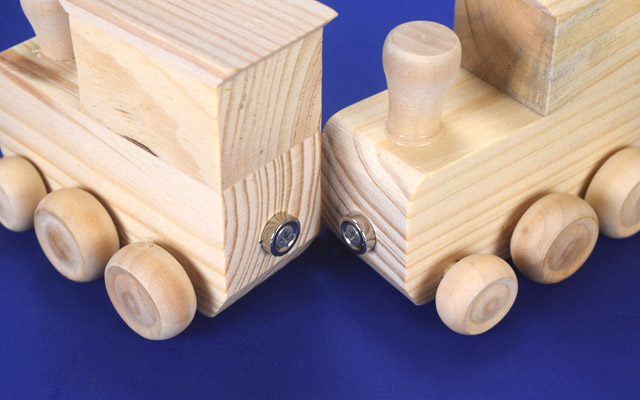

While we were experimenting, one of our customers emailed us, wanting to make some custom magnetic trains himself...he had the awesome idea of using some upholstery tacks with magnets set underneath the head. We tried this out, and it was a clear winner! Using our R621 ring magnet magnets, this setup has a firm enough hold, allows for turning, and has that classic train look. Thanks to our customer for the idea!

Ring magnets for metal thumbtack or steel ball connector
Shop Now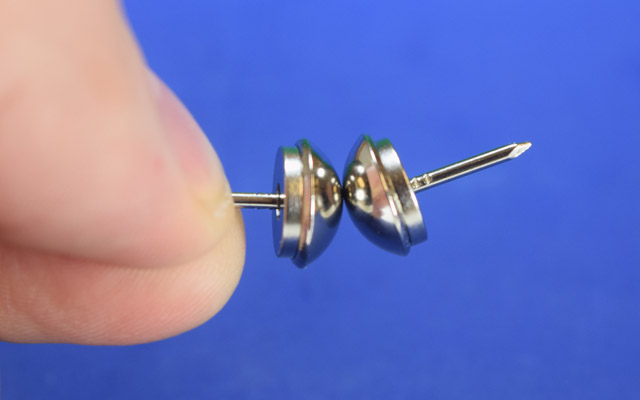
Materials and Build
The materials are simple, some wooden trains, 7/16" diameter x 1/2" long upholstery tacks, and some R621 countersunk ring magnets. Check out the video below to see the build in action!
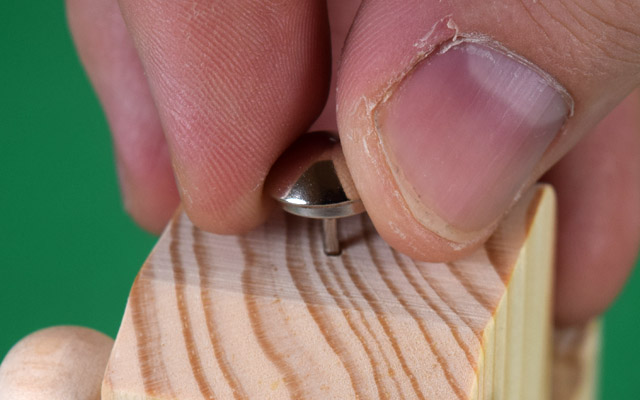
We thought we'd be able to push the tacks right into the wood, but it wasn't consistently successful. So we pre-drilled a small hole on both the front and back of each train.
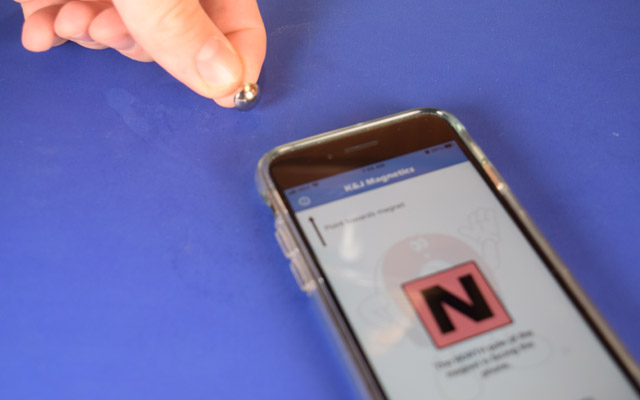
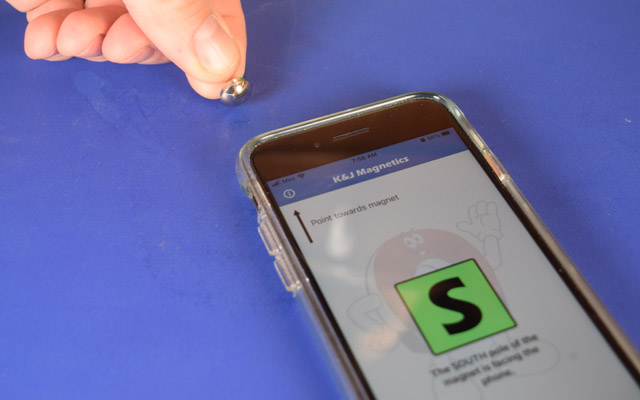
Next, we marked the north pole of each R621 countersunk hole ring magnet. We made two piles of magnetic upholstery tacks - one pile had the north pole facing the head, one had the north pole facing the pin. We'll use one pile for the rear of the train, and one for the front, that way all of the trains will connect, no matter what order they are in.
Then, we just had to push the magnetic tack assemblies into the trains and we were done. We had a quick and effective magnetic train set. We found that it took just over 0.5 lb of force to pull two trains apart. That's a little more than a traditional magnetic train, but still weak enough to remove easily. For larger trains, you might step up to the R622 ring magnets or R822 ring magnets.
Also, with our setup, the trains couldn't make a really tight turn. There isn't enough room between the trains to do so. Using a thicker magnet would allow for tighter turns. We're quite pleased with the results! We're magnet nerds, not artists, so we didn't attempt to paint the trains, but be sure to send us pictures of your magnetic trains!
Make it better
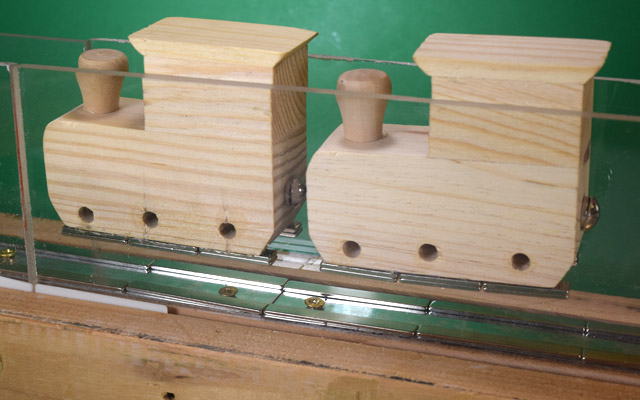
How could we make this project, better, cooler, and more attractive (more like repelling)? Add more magnets! We turned some of these trains into a MagLev train set! In our old Maglev Trains article, we go into more detail about MagLev trains and how to get stable levitation. Check out that article for more information.
Materials and Build for the MagLev track
Some wood, plexiglass, BY041 block magnets and BX041 block magnets magnets, some steel, and wooden trains.
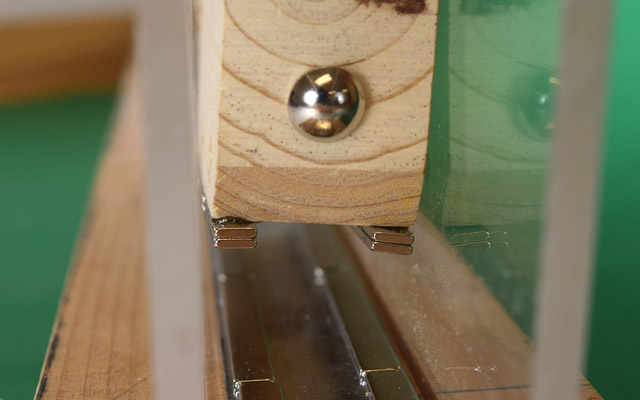
First, we cut the wheels off of the magnetic trains, we won't be needing those anymore! Next, we glued some BX041 neodymium block magnets to the bottom of the train, making sure that the same pole was facing out on all of the magnets. We decided to use two smaller tracks, one on either side, rather than a single row of magnets in the middle of the train. From previous experience, we know that using two tracks like this has better stability.


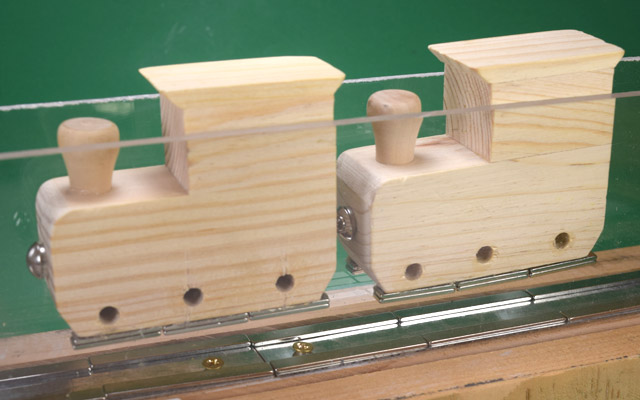
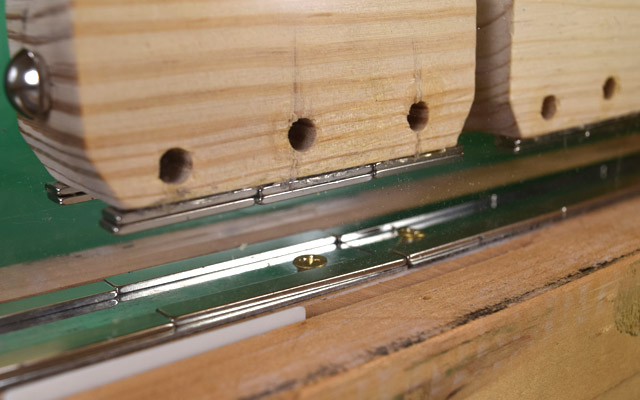
Then, we cut some grooves into a piece of wood to accept the plexiglass (which will hold the trains in place), and mounted some steel in the middle. We stuck some BY041 block magnets magnets on the steel, again making sure that the same pole of each magnet was facing up. Like poles repel, which is what we want here! We used the steel, rather than gluing, to make it quicker and easier to move and change the magnets if needed.
Tips and Tricks
Repelling magnets are highly unstable, as we mention in our original Maglev Trains article and in our Diamagnetism and Levitation article. Repelling magnets won't stay repelling by themselves, some outside force needs to hold them there. In our design, the plexiglass sides keep the trains above the track, stopping them from flipping around or falling off.
 Using the same tack+magnet assembly, you can have as many as your track can
hold!
Using the same tack+magnet assembly, you can have as many as your track can
hold!
We also found the levitation to be a bit more stable when the two tracks were slightly offset. We made the bottom track slightly narrower than the magnet tracks on the train.
Making a MagLev Train set really steps up the magnetic train game! You can also do cool things with it. One of our engineers can recall having to make a MagLev train in grade school, that was powered by a CO2 cartridge. The goal was to make a train that could protect the passenger when the train slammed into a wall...the passenger being an egg.
It doesn't take much force to move the trains along the track, so there could be some fun ways of getting the train to zoom around the track!