We are now required to collect sales tax in several states. Learn more about tax exempt status for your business.
We’ve heard from a number of customers who use strong neodymium magnets to create screens for car camping. Magnetically attached screens allow car campers to leave the windows open for ventilation while keeping bugs out.
Now that summer is here, we’ve run out of excuses. It’s time to make some of these screens for ourselves!
Many of the products and DIY examples we’ve seen are custom cut to fit the window of a particular vehicle. They usually have some kind of seam around the edges, into which magnets are sewn.
Assuming we don’t have any sewing skills (not too far from the truth), could we just cut a screen and stick some magnets on it? Since it’s so easy to try, naturally we did this first.
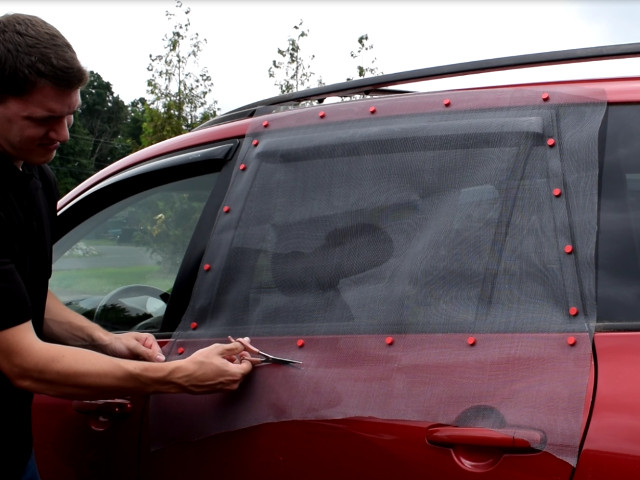
We like coated magnets for this setup, since regular nickel plated magnets could scratch the paint of a vehicle if accidentally slid across it. We used D84PC-RED magnets to secure a screen to the rear window of a Toyota RAV4. In hindsight, black might look nicer on many vehicles.
We also used B666BR-N52 cubes, which worked well.
The good: This is fast and easy. With a stack of magnets and a roll of screen from the hardware store, this can be done very quickly with just a pair of scissors.
The bad: There’s obviously a little more setup involved each time you put up the screen. It doesn’t look quite like a finished product like some nicer ones we’ve seen. It can be a little challenging to make sure the screen is taut between the magnets. It should be held close enough that bugs can’t sneak in!
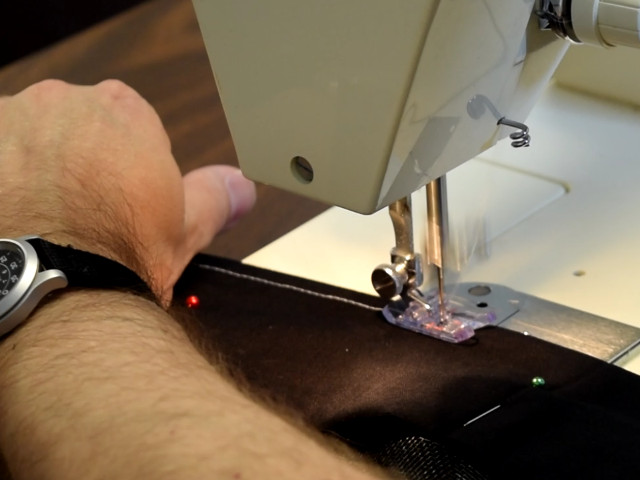

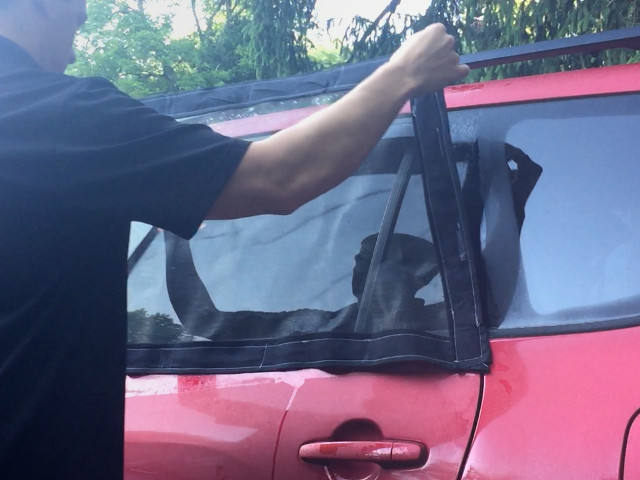
For a more finished screen, we used black cotton material to sew a border around the edges. The plan is to permanently sew magnets into the border, making installation on the vehicle easy and fast.
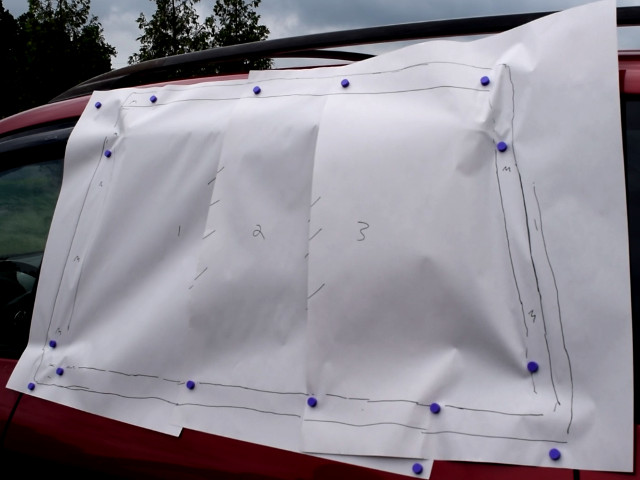
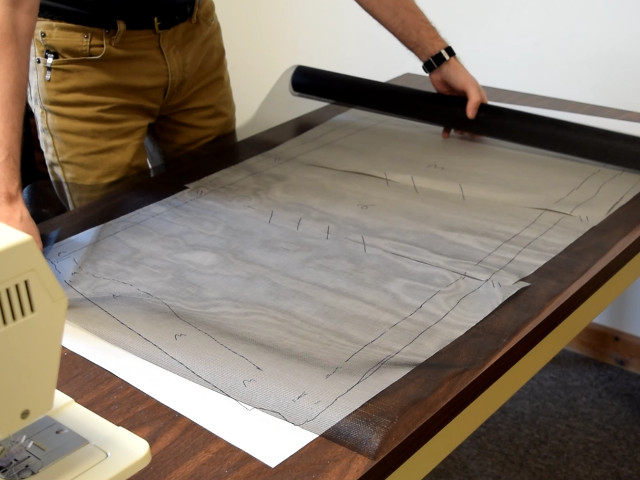
First we made a paper template or sewing pattern for the shape. Car windows are bigger than you expect, so you’ll need a big roll of paper to make a pattern.
Sewn with two lines of stitching, there’s a pocket where we can embed magnets. We laid the bordered screen flat and set magnets in the planned locations.
What magnets should we use? We tried two different magnets to test both and see what we liked better. One half used SWP-M sewing magnets, and the other used simple D8H1 disc magnets. Note that the sewing magnets come in matched pairs; ordering a quantity of 1 gets you 2 magnets.
We found the sewing magnets a little nicer for a few reasons:
The plain disc magnets were also effective. The 1/2” diameter x 1/10” thick D8H1 magnets worked well, and add up to roughly half the cost of the sewing magnets. Even if we step up to the slightly stronger, 1/8” thick D82 magnets, the cost is still lower.
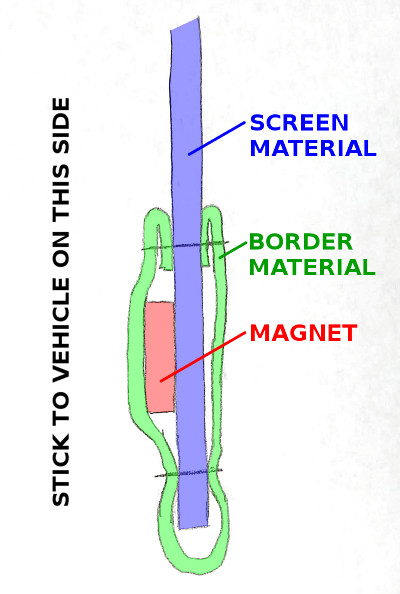
If you are embedding magnet inside a seam or other border material, try to make any material layer(s) between the magnets and the car as thin as possible. Put the magnet so it reaches through the least amount of material.
If you have thicker material between the magnet and the steel surface of your vehicle, you’ll need a bigger magnet to get the same strength as a smaller magnet you get close. Making this layer thin saves money!
Check your car to see what parts of it are magnetic. With so many cars utilizing plastic trim over surfaces, not everything you see is steel. Test it with a magnet. We like the handy, plastic coated D68PC-RB for testing.
Some vehicles have black, vertical borders around the window that have a plastic cover. The magnets have to reach through that plastic layer to attract to the underlying steel, resulting in a weaker hold.
Happy Camping!


 Cart
Cart